Open Folders in Any Code Editor with One Click (Mac)

Ever get annoyed having to launch VS Code first, then navigate to your project folder? Me too! Here's a super simple way to add an "Open in VS Code" option to your right-click menu in Finder.
The Problem
As developers, we constantly open project folders in our code editors. If you're a Windows user, you're probably used to simply right-clicking on any folder and seeing "Open with VS Code" in the context menu - it's a native feature that makes life much easier.
But on macOS? Not so lucky. The default workflow usually looks like this:
- Launch VS Code (Or any other code editor)
- File > Open...
- Navigate to your folder
- Click Open
That's way too many steps for something we do dozens of times a day! While you can drag folders to the VS Code icon in the dock, it's still not as convenient as a simple right-click option.
The Solution: Automator (Custom Quick Action)
The simplest solution is to create a Quick Action with Automator that adds an "Open in VS Code" option directly to your Finder's context menu. No shell scripts needed, so it won't break with OS updates.
Here's how to set it up in less than 2 minutes:
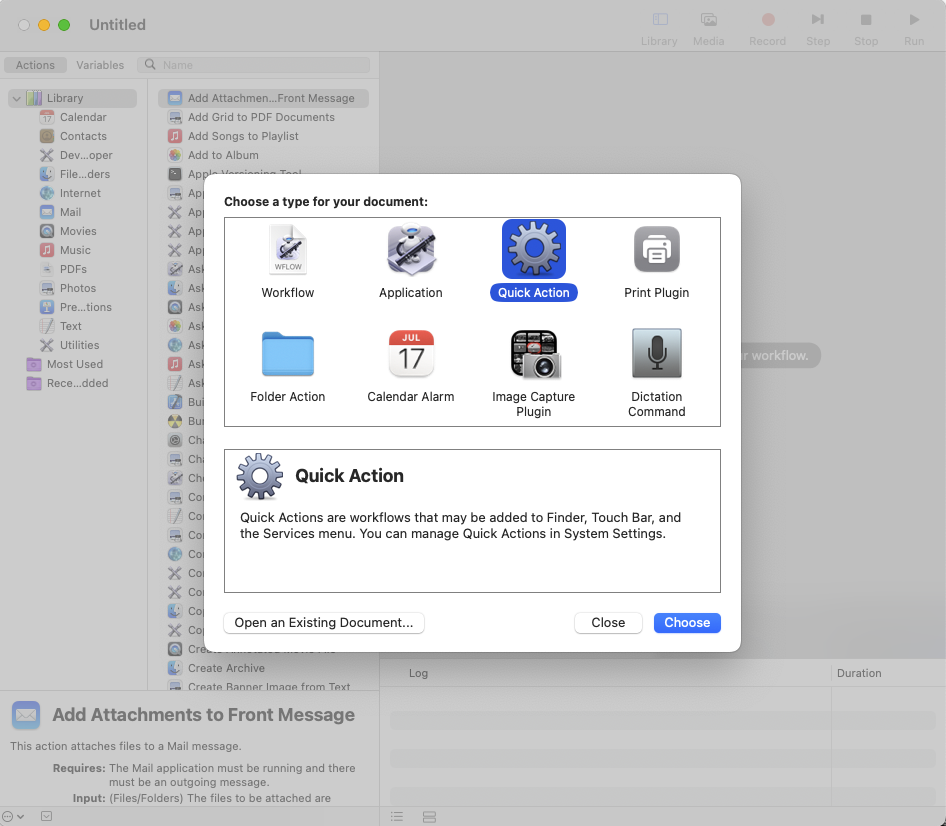
Step 1: Launch Automator
Open Automator from your Applications folder and select "Quick Action" when prompted to create a new document.
Step 2: Configure the Quick Action Settings
At the top of the workflow pane, configure these settings:
- Set "Workflow receives selected" to files or folders
- Set "in" to Finder
- Choose an image (I recommend selecting VS Code's icon for easy recognition)
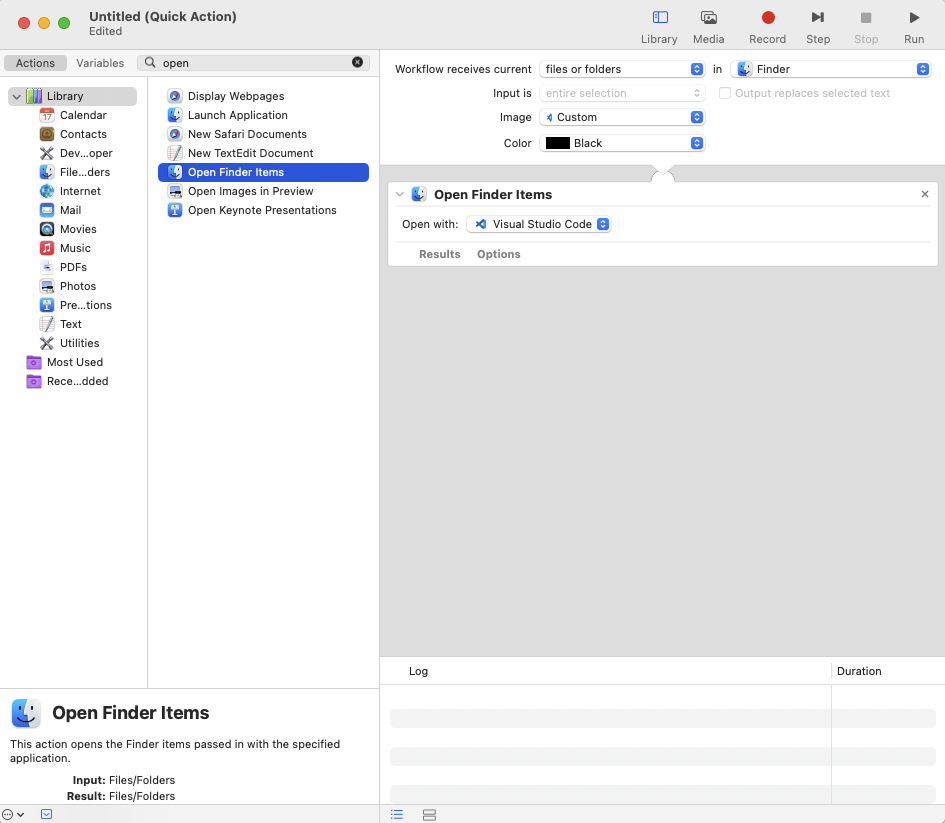
Step 3: Add the "Open Finder Items" Action
In the search bar on the left, type "open" and find Open Finder Items. Either double-click it or drag it to your workflow area.
Step 4: Choose VS Code as the Application
In the "Open Finder Items" section, click the "Open with:" dropdown, select "Other..." and navigate to Visual Studio Code in your Applications folder.
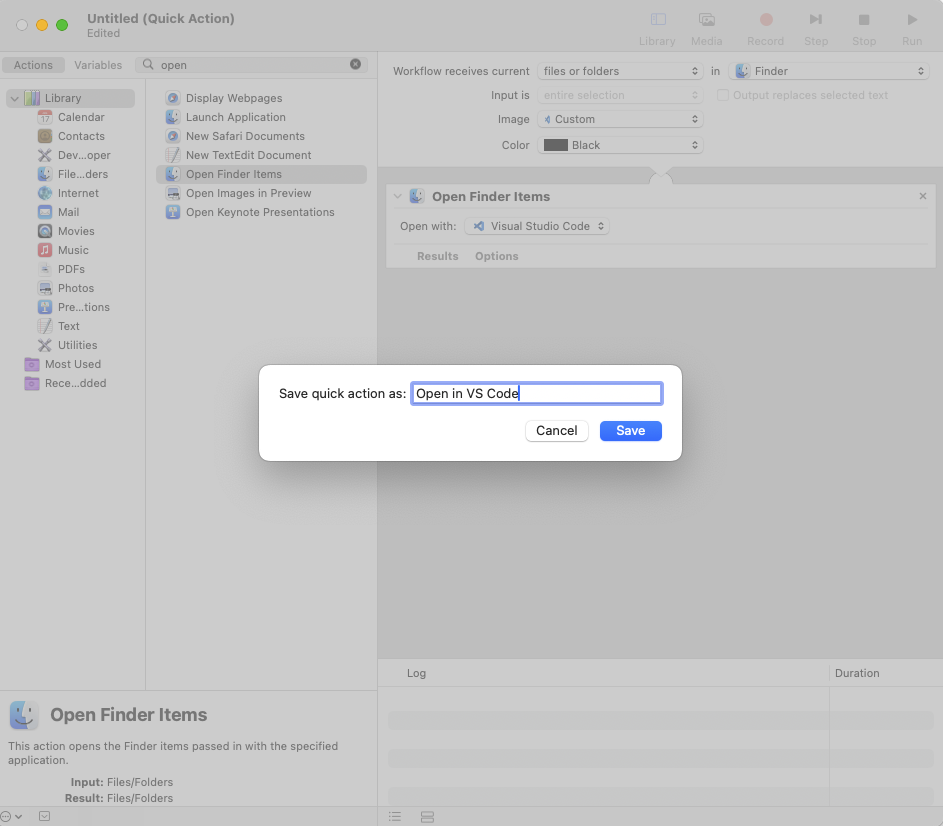
Step 5: Save Your Quick Action
Press ⌘+S (CMD+S) to save and name it "Open in VS Code". That's it! Your Quick Action is now available in Finder's context menu.
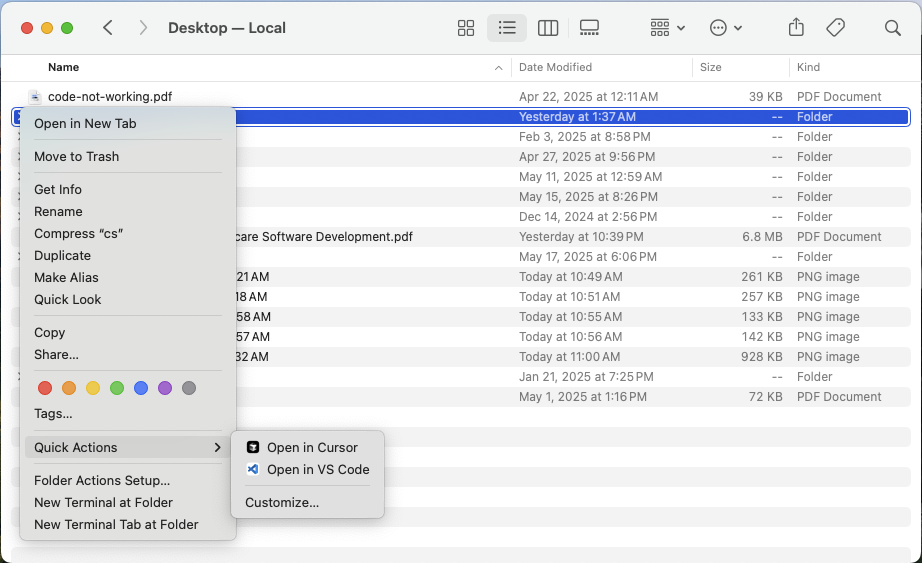
Using Your New Quick Action
Now when you right-click on any file or folder in Finder, you'll see "Open in VS Code" under the "Quick Actions" submenu.
How to Remove the Quick Action (If Needed)
If you ever want to remove this Quick Action:
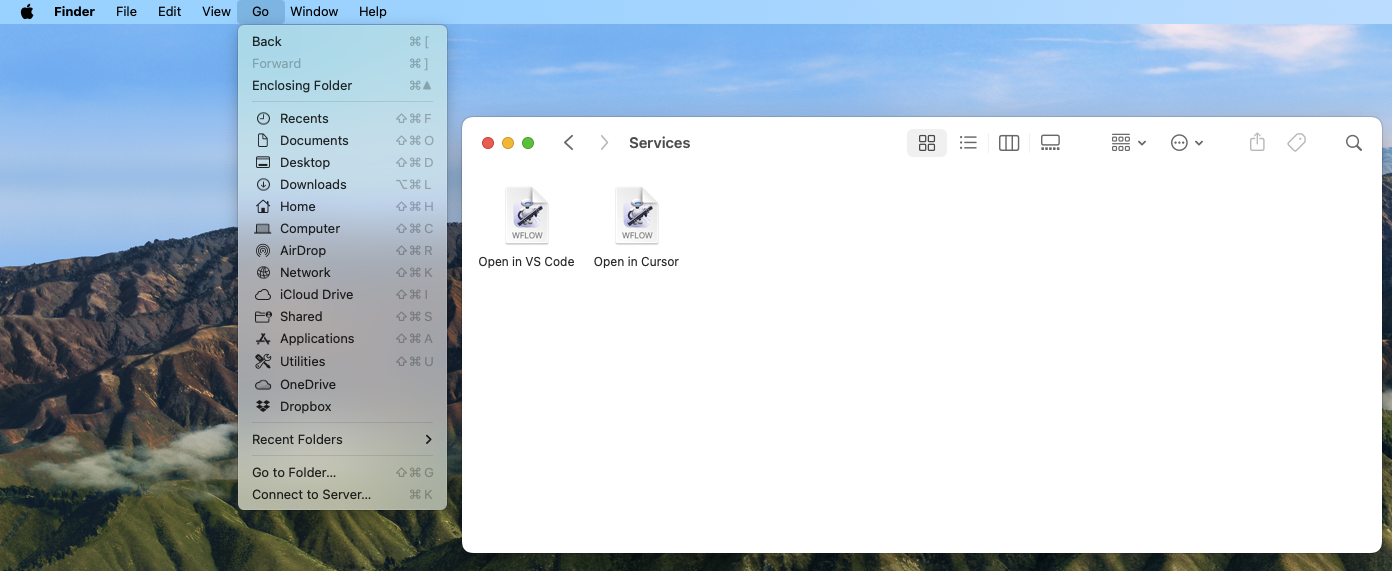
- In Finder, click on Go > Home from the menu bar
- Navigate to Library/Services folder (press ⌘+Shift+. if the Library folder is hidden)
- Find your "your-action.workflow" file and move it to trash
Other Editors
You can create similar Quick Actions for other code editors. Just follow the same steps but choose a different application in Step 4.
This tiny time-saver has made a huge difference in my workflow. No more clicking through menus or dragging folders into VS Code's icon. Just right-click and you're coding!